
What gets synced
When you set up a Planning Center sync, ClearPolicy pulls in each person’s:- Full name
- Email address
- Group membership based on the Planning Center list you connected
Sync is one-directional. ClearPolicy imports from Planning Center into
ClearPolicy groups. Changes you make in ClearPolicy are not synced back to
Planning Center.
How to connect and set up sync
1
Go to Integrations
In ClearPolicy, navigate to Settings → Integrations → Planning
Center.
2
Authorize Planning Center
Click Connect and sign in to your Planning Center account when prompted.
ClearPolicy will request read access to your lists and the people in them.
3
Choose a Planning Center list
Select the Planning Center list you want to sync.
4
Choose the ClearPolicy group
Select the group that should receive people from that list. You can create a
new group using the list name or sync into an existing group.
5
Add the sync
Click Add List, then click Save changes to start syncing that
Planning Center list to the selected group.
6
Send documents
Once the sync is active, you can send any published document to that group
for electronic signature.
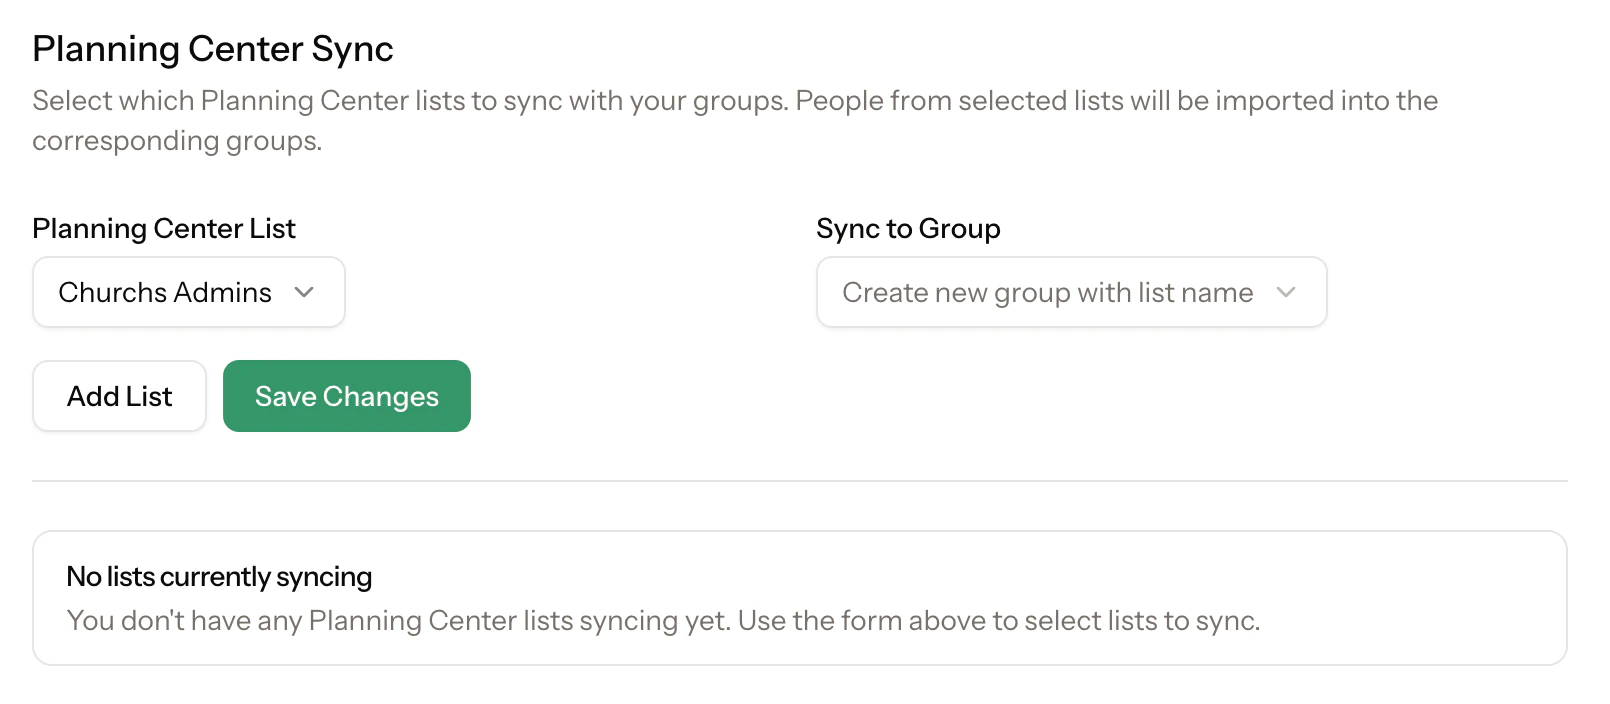
Set up a new sync by selecting a Planning Center list and mapping it to a ClearPolicy group.
Manage existing syncs
After a list has been connected to a group, the sync settings page shows each active list-to-group connection. You can review the sync status, confirm the last sync time, run Sync Now, or remove a sync you no longer need.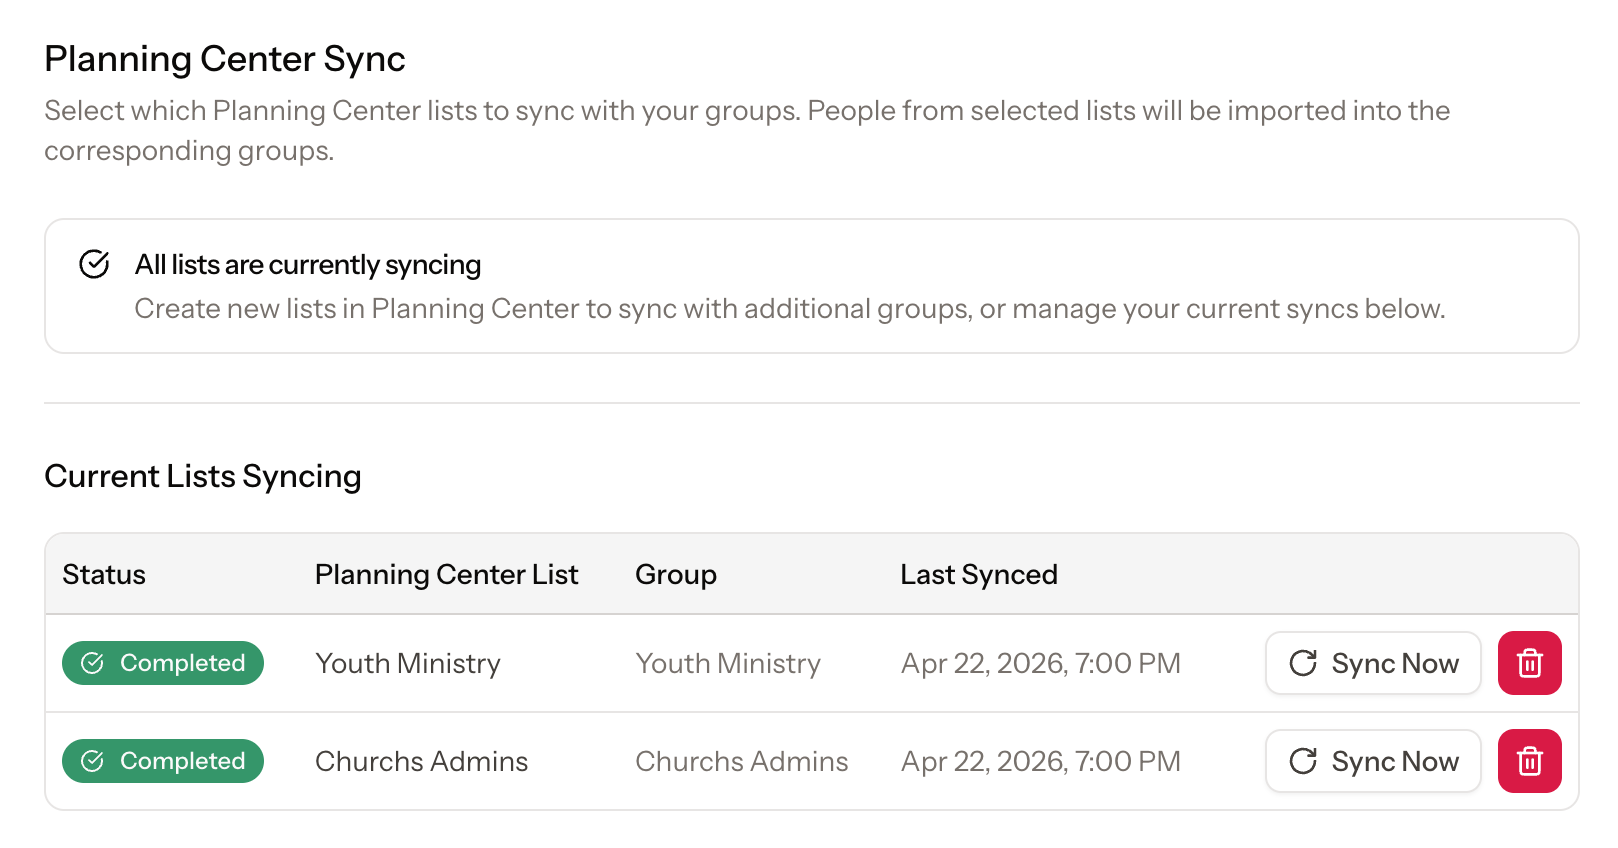
Review active syncs, check the last sync time, and run a manual sync when needed.
If a person’s email address already exists in ClearPolicy, they won’t be
duplicated during sync.